Thursday, January 30, 2014

Hedgelaying Workshop (was January 18-19)

Hedges.

To me, they are one of the elements intrinsic to the English countryside.

Hedgelaying then is the traditional means of maintaining hedges.

For the sake of time, I'll direct you over to my blog post from last time pertaining to hedges and hedgelaying...
http://myverygreatadventure.blogspot.co.uk/2012/02/hedge-laying-workshop.html

I included a bit of history and a bit of "how to".

In my last hedgelaying workshop, I was busy and didn't get to take many pictures. This time around, I wasn't actually participating, so I took lots of pictures.

Essentially, we were laying the hedge along the same hedgerow as last time, just a bit further along. There has been one section of hedge layed since, between where we ended in 2012 and where we started this year.

Without further adieu...

The initial length of hedge (far left in photo to just before the tree in middle of hedge-to the right in the picture) was done in 2011 sometime, by a group of boys from Tonbridge School. If you look closely you can see there is alot of new growth on the top of that first section.
So. In my previous workshop (2012) we started about 8-10 feet left of that tree (with the few leaves at the right of the photo)...


and went along, behind the watering troughs


to somewhere around the center of the photo below...


 another group came in last year and did the next section, about down to where everyone is standing...


and this years group picked it up from there, or rather... layed it down.
Here they are in teams of two!

Pleaching and laying the hedge, keep in mind, this is Hawthorn -a commonly used species for hedges (and hedgerows in general, even in Vermont), as the thorns create additional incentive for animals to stay on their own side of the hedge- leather gloves highly recommended!


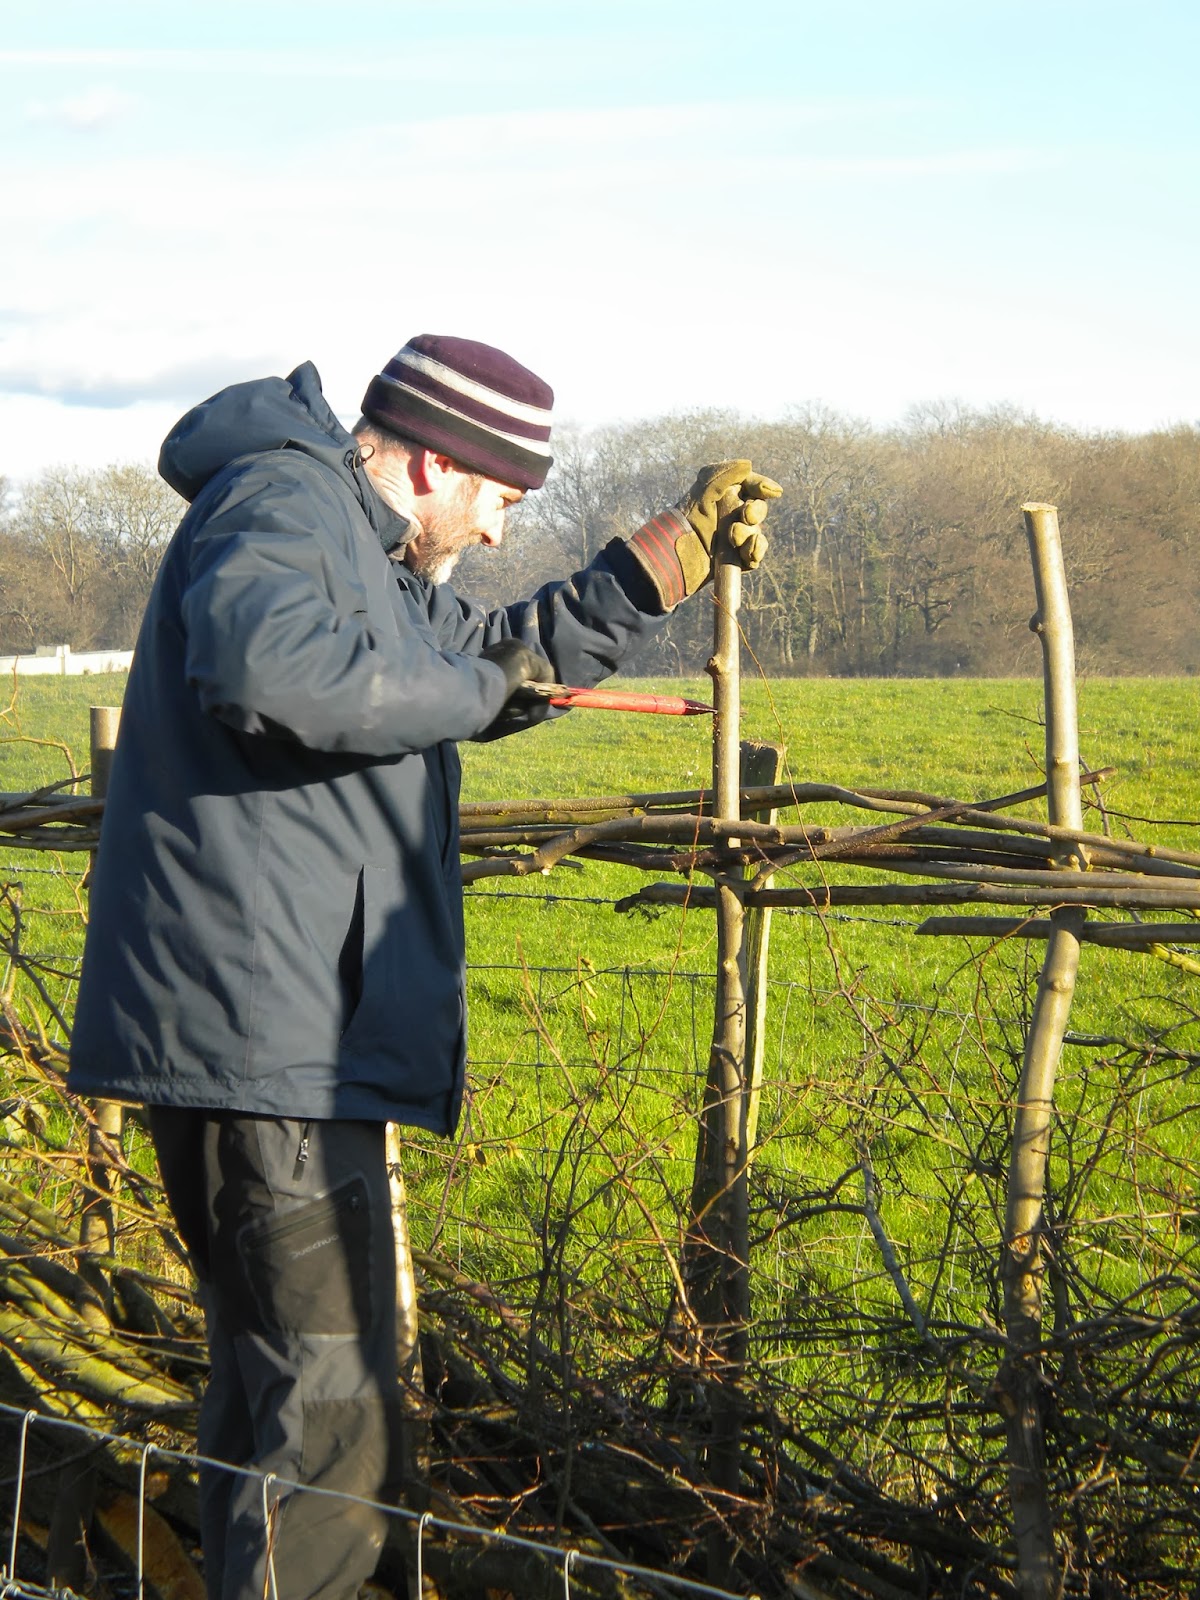
Next up, staking. John gives a demo on pointing the stakes... and some awesome tips for various way to use the bow saw for sawing off the top of the stake.


I have to say, John has a wealth of knowledge, and is adept at using both his words and demonstrations to help you understand what you are doing, or what you are supposed to be doing. His tips on how to use a tool, or hold a tool are invaluable really.

Thing is, some folks, like me, have to see/hear/do things multiple times before the light bulb goes on. A light bulb went on for me during this workshop pertaining to putting a point on a stake that has a curve in it.

Granted, the brightness of that light bulb has dimmed somewhat in the last couple weeks... but, at least it went on, right?

One of those invaluable John Waller tips. Tip #55
3 ways to cut using the bow saw:
1) hold the wood still and move the saw... this is most commonly how we tend to work with it, but you can also
2) hold the saw stationary in a horizontal position with one hand and move the wood or
3) step on the saw to hold it stationary in a vertical position, grasp and move the wood with two hands...
like JW is doing in this next picture... I never thought of this!

Pointing and trimming stakes...


Staking the hedge...


What did I do all day? Well, I took pictures, helped keep the fire going with all the offcuts, talked, threw sticks for Arthur (who was bored), made tea, talked, took pictures...

 Even a small fire can put off alot of heat...


Arthur needed a little nap...


How I did it I'm not sure, but somehow I managed to not get any pictures of the binding being done.
:-(

Here's the whole crew, standing in front of their completed hedge.


It was pretty much an idyllic day... These folks were absolutely delightful, every one. There was plenty of laughter and good conversation all day long. Another 100 feet of hedge was layed, carrying on a traditional craft that is century's old. The weather was clear and crisp. The fire was warm. There was tea made from the Kelley kettle. Proper English tea too.

It doesn't get much better than that. Does it?

Life is good.

Closing with a few pictures that Paul (yellow coat, red trousers) sent as he managed to capture the finished product, binding and all. Thanks very much Paul!

It is a thing of beauty. A work of art. 


a couple more years worth of hedge left to go... then what John Waller?

I have been sitting... typing... uploading pictures for so long my hands have turned to ice.

I am off for a walk to Tunbridge Wells.

Even if I will be singin' in the rain.
love to all-
susie

Spatula #2

spatula
ˈspatjʊlə/
noun
  1. 1.
    an implement with a broad, flat, blunt blade, used for mixing and spreading things, especially in cooking and painting


This is the second one I made way back in December. Gave it as a Christmas gift to my friend Duncan. He really liked it too! Having done some wood working himself he was fairly well impressed with my craftsmanship.

This one only took me a couple hours from start to finish...

Go me!

Hope I have opportunity to make more things via shavehorse and drawknife while I'm here...

I love this sort of work and dream of wiling away the hours...sitting on the shavehorse, drawknife in hands... drinking in the smell of the wood, appreciating the curl of the shavings as they peel away from the piece and fall to the floor. They dry feather light and make the most wonderful kindling.

There is something enormously satisfying about working with wood... and making something useful and beautiful out of it.

This is reminding me of Dick Proennke and the video "Alone in the Wilderness" my friends and I watched repeatedly several years ago. It documents the story of his experience living in the Alaskan wilderness. In it, after he has finished building his log cabin, he needs a spoon so he can rustle up a stew for lunch.. so he makes one, right then and there... Dick says, "not bad for a days work".

I agree.
Love from England-
susie


Wednesday, January 1, 2014

How to Make a Spatula

Pretend you have felled your tree... cut it up into chunks of the appropriate length... and split one of those chunks so that you have ended up with a pie shaped piece... and trimmed it to the length you want your spatula to be.


Now. How many spatulas do you see in this chunk of wood?


You have no idea? That's okay. Neither did I when John asked me. Was I supposed to know that? Does a spatula get made going in the direction of the rings or perpendicular to the rings, I wondered?

The answer to Johns question is 4. The answer to mine is perpendicular.

Next step is to use an axe to split the piece that will become your spatula out of the pie shaped chunk. Making and even smaller pie shaped piece.


Like so.


He makes it all look so easy, doesn't he?

Next. Rough out the overall shape of the spatula by removing the bulk of the extra wood, again using axe and wooden mallet.


Until you end up with something like this... or something symmetrical... your choice.


Now you are ready to go use the shavehorse and drawknife to smooth and finalize edges and surfaces.
What is a shavehorse and drawknife?

a little detour over to Wikepedia:
Shave horses (shaving horse, shaving bench) are a combination of vice and workbench, used for green woodworking. A foot-actuated clamp holds the work piece securely against pulling forces, especially as when shaped with a drawknife or spokeshave.
As the name "horse" suggests, the worker sits astride the shaving horse. The clamp is operated by the operator pressing their feet onto a treadle bar below.
Typical usage of the shaving horse is to create a round profile along a square piece, such as for a chair leg or to prepare a workpiece for the pole lathe.

drawknife is a traditional woodworking hand tool used to shape wood by removing shavings. It consists of a blade with a handle at each end. The blade is much longer (along the cutting edge) than it is deep (from cutting edge to back edge). It is pulled or "drawn" (hence the name) toward the user.


Alrighty then... back to John...

He finishes the handle first because that is the sturdiest part of the spatula. Meaning the handle is then still sturdy enough to hold while shaping the thinner, more fragile flat blade part... does that wording make sense to you? Also, contrary to what wikepedia said, you can use a drawknife by 'pushing' or cutting away from your body too...which is what John is doing in this first photo, shaping the sides of the blade.


 and then last but not least the flat surface of the blade. One side...


and then the other, making a gradual and even taper to the end.


Voila. A spatula...


(a word about that facial expression... I don't know why or how, but I do seem to bring out the natural goofiness in people...)

I would be surprised if the making of the spatula from the splitting of the wood to the finished product took John more than 10 minutes... really think it probably took him less than that.

I on the other hand took a several hours on two different days to make my first spatula. My first spatula ever. I was going for symmetrical --well, actually, I really liked Johns asymmetrical design, so when I started with the axe work I was going for asymmetrical and then at the end of the rough cutting stage it was looking fairly symmetrical-- so I was going for that but when it was all said and done it was sort of asymmetrically symmetrical... if you know what I mean.

You can see for yourself.

Here it is. Not bad for a first try, if I do say so myself...


I gave it to my friend Tina for Christmas. She genuinely loved it. That made me happy.

Time to let my body do something besides sit... I wish you all health and happiness in the year 2014.

love, as always-
susie