Pretend you have felled your tree... cut it up into chunks of the appropriate length... and split one of those chunks so that you have ended up with a pie shaped piece... and trimmed it to the length you want your spatula to be.
Now. How many spatulas do you see in this chunk of wood?
You have no idea? That's okay. Neither did I when John asked me. Was I supposed to know that? Does a spatula get made going in the direction of the rings or perpendicular to the rings, I wondered?
The answer to Johns question is 4. The answer to mine is perpendicular.
Next step is to use an axe to split the piece that will become your spatula out of the pie shaped chunk. Making and even smaller pie shaped piece.
Like so.
He makes it all look so easy, doesn't he?
Next. Rough out the overall shape of the spatula by removing the bulk of the extra wood, again using axe and wooden mallet.
Until you end up with something like this... or something symmetrical... your choice.
Now you are ready to go use the shavehorse and drawknife to smooth and finalize edges and surfaces.
What is a shavehorse and drawknife?
a little detour over to Wikepedia:
Shave horses (shaving horse, shaving bench) are a combination of vice and workbench, used for green woodworking. A foot-actuated clamp holds the work piece securely against pulling forces, especially as when shaped with a drawknife or spokeshave.
As the name "horse" suggests, the worker sits astride the shaving horse. The clamp is operated by the operator pressing their feet onto a treadle bar below.
Typical usage of the shaving horse is to create a round profile along a square piece, such as for a chair leg or to prepare a workpiece for the pole lathe.
A drawknife is a traditional woodworking hand tool used to shape wood by removing shavings. It consists of a blade with a handle at each end. The blade is much longer (along the cutting edge) than it is deep (from cutting edge to back edge). It is pulled or "drawn" (hence the name) toward the user.
Alrighty then... back to John...
He finishes the handle first because that is the sturdiest part of the spatula. Meaning the handle is then still sturdy enough to hold while shaping the thinner, more fragile flat blade part... does that wording make sense to you? Also, contrary to what wikepedia said, you can use a drawknife by 'pushing' or cutting away from your body too...which is what John is doing in this first photo, shaping the sides of the blade.
and then last but not least the flat surface of the blade. One side...
and then the other, making a gradual and even taper to the end.
Voila. A spatula...
(a word about that facial expression... I don't know why or how, but I do seem to bring out the natural goofiness in people...)
I would be surprised if the making of the spatula from the splitting of the wood to the finished product took John more than 10 minutes... really think it probably took him less than that.
I on the other hand took a several hours on two different days to make my first spatula. My first spatula ever. I was going for symmetrical --well, actually, I really liked Johns asymmetrical design, so when I started with the axe work I was going for asymmetrical and then at the end of the rough cutting stage it was looking fairly symmetrical-- so I was going for that but when it was all said and done it was sort of asymmetrically symmetrical... if you know what I mean.
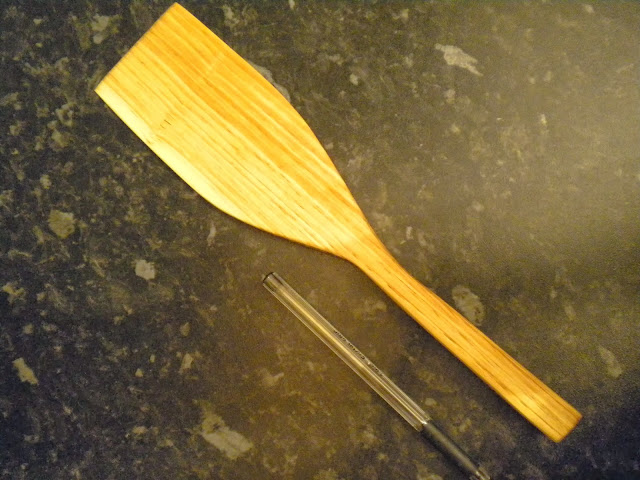
You can see for yourself.
Here it is. Not bad for a first try, if I do say so myself...
I gave it to my friend Tina for Christmas. She genuinely loved it. That made me happy.
Time to let my body do something besides sit... I wish you all health and happiness in the year 2014.
love, as always-
susie


No comments:
Post a Comment